Using key-based authentication for SSH

1 Generating key pair
On Microsoft’s website there’s already a post for this:
https://learn.microsoft.com/en-us/windows-server/administration/openssh/openssh_keymanagement
Run PowerShell with administrative access.
Run ssh-keygen to generate an RSA key pair.
| |
You will be prompted to enter the file location. I use id_rsa_test here.
| |
Then enter a passphrase to protect the key.
| |
Add the key to the ssh-agent so that you won’t need to enter the passphrase again.
For Windows, there are a few extra steps before ssh-add.
| |
2 Deploying the public key
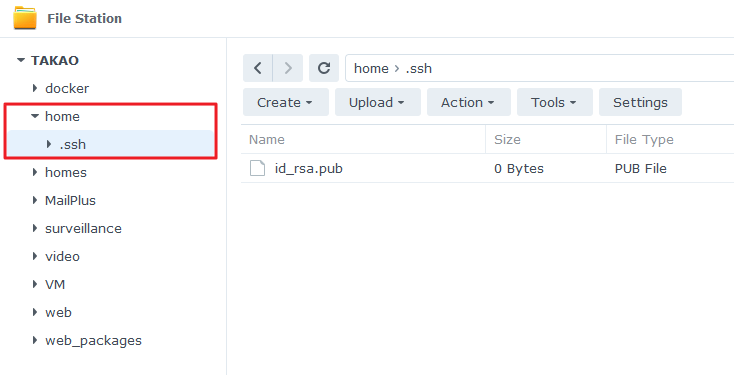
2.1 On a Synology DSM
- Sign in to DSM as an administrator.
- Go to DSM File Station > home.
- Create an sub-folder named .ssh.
- Upload the public key id_rsa.pub to the .ssh folder.
For more details, see:
2.2 On OpenWrt
To do this from LuCI:
- Navigate to LuCI → System → Administration → SSH-Keys
- Copy the contents of your public key file. It will be a long string starting with
ssh-rsa ...and ending with something like... [email protected] - Paste that string into Paste or drag key file… field on the web page
- Click the Add key button
- To test: open a new window in your terminal program and enter
ssh root@your-router-addressYou should be logged in without entering your password.
For more details, see:
https://openwrt.org/docs/guide-user/security/dropbear.public-key.auth#from_the_luci_web_interface
3 SSH to the host
Because I changed the SSH port number to something else (instead of the default 22), I need to specify the port number in two ways:
- ssh ssh://user@address:port
- ssh -p port user@address
4 Removing the private key
Before Remove Identity You need to start ssh-agent with this command
| |
For Remove All Identity
| |
To Remove Specific Identity
| |
For Find a List of available Identify by using this command
| |
For more details, see:
